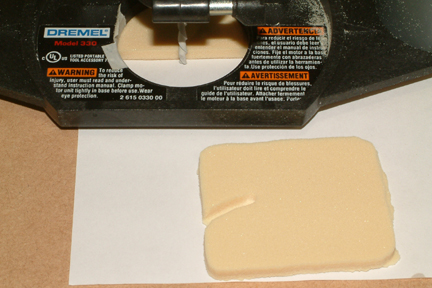
This is the first part that I had to glue multiple foam
pieces together using the hinged method. Surprisingly, this method was quite
easy and worked well. The biggest challenge was to get symmetrical &
consistent rounding inside corners. These corners also have different radii. I
tried wrapping sand paper around various diameter wood dowels without great
success – because I do not have that consistent ‘touch’ from one corner to
another – as a professional carpenter. I ended up with transitional bumps
between the rounded corners to the straight edges. Its’ probably OK,
functionally. However, if I have to look at the imperfection every time I get on
the plane, I’ll hate myself for not doing something about it early on… As a
result, I had a set of angled templates with
rounded corners made, resulting in a nicely
rounded inside corner every time!
Making the vertical stiffeners
was challenging. I followed the ‘plastic wrapped wood strip’ and BID tape
recommendations by others. It was done, but the quality will definitely blow my
Grand Championship Quality Award!
Lessons
learned – BID tape and rounded corner
templates.
 In
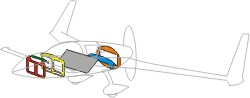
this Chapter, we are going to build various cross members of the aircraft. They
are the Instrument Panel, Seat Back, Landing Gear Bulkheads, Firewall and a
couple front panels namely F22 and F28. Since this is the first chapter,
all the parts are flat and free of curvatures. This give us plenty of
opportunity to get some hands on training. Most of these parts are non-critical
parts - that's good, because I am not sure I know what I am doing yet.
In
this Chapter, we are going to build various cross members of the aircraft. They
are the Instrument Panel, Seat Back, Landing Gear Bulkheads, Firewall and a
couple front panels namely F22 and F28. Since this is the first chapter,
all the parts are flat and free of curvatures. This give us plenty of
opportunity to get some hands on training. Most of these parts are non-critical
parts - that's good, because I am not sure I know what I am doing yet. 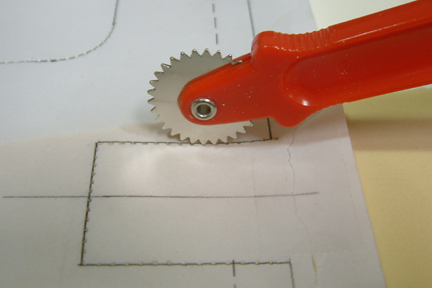 I
transferred the drawings onto the foam using a tracing wheel they use for sewing
(I learned this from the Cozy forum & various web sites).
I
transferred the drawings onto the foam using a tracing wheel they use for sewing
(I learned this from the Cozy forum & various web sites). 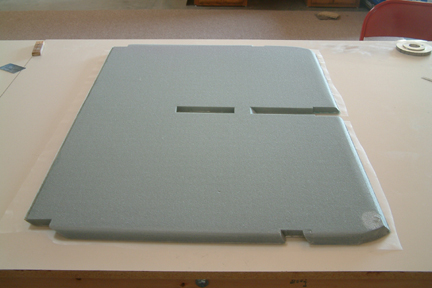
 I
set the depth of cut by placing a thin
paper between the tabletop and the end of the router bit as shown. Once set, I
routed along the traced lines. When completed, only a paper-thin foam is left
connecting the bulkhead cutouts and the residual foam. Break off the bulkheads
pieces as needed. Just a slight brush off with 100 grit sandpaper will result in
smooth edges for the bulkheads.
I
set the depth of cut by placing a thin
paper between the tabletop and the end of the router bit as shown. Once set, I
routed along the traced lines. When completed, only a paper-thin foam is left
connecting the bulkhead cutouts and the residual foam. Break off the bulkheads
pieces as needed. Just a slight brush off with 100 grit sandpaper will result in
smooth edges for the bulkheads.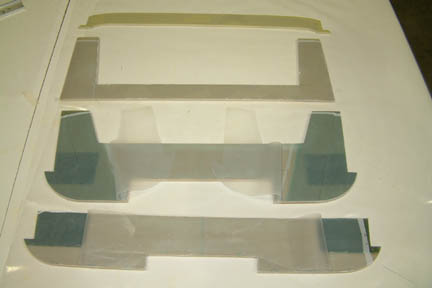 Due
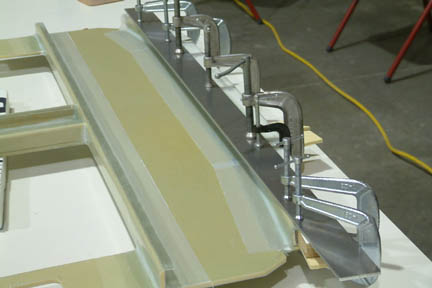
to the slight thickness of the foam and somewhat aggressive squeezing of the BID
layers for the hard points, they ended up too thin. With some careful measuring
and estimating, I ended up with 27 layers of BID cloth instead of the 22 layers
per plan. I did get a nice flush between the hard points and the foam. You can
see the peel ply that was partially trimmed and pulled back as well as the
plastic peel ply.
Due
to the slight thickness of the foam and somewhat aggressive squeezing of the BID
layers for the hard points, they ended up too thin. With some careful measuring
and estimating, I ended up with 27 layers of BID cloth instead of the 22 layers
per plan. I did get a nice flush between the hard points and the foam. You can
see the peel ply that was partially trimmed and pulled back as well as the
plastic peel ply.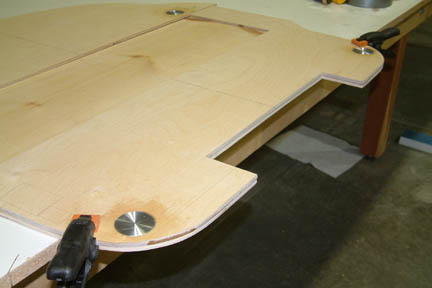 I
traced out the drawings for the firewall as the other bulkheads and cut out both
the temporary and permanent ones per plan. Once made, I clamped the firewalls
together and performed the edge sanding and hole drilling together. This
way, hardware positions on the temporary and permanent firewalls will be the
same.
I
traced out the drawings for the firewall as the other bulkheads and cut out both
the temporary and permanent ones per plan. Once made, I clamped the firewalls
together and performed the edge sanding and hole drilling together. This
way, hardware positions on the temporary and permanent firewalls will be the
same. You're
probably wondering what in the world are those round inserts – instead of the
1” square inserts per plan. Based on the Wayne Hicks’ and others web site, it was
suggested that a larger insert (~1.25" sides square) might be worthwhile. Therefore, instead of the
1”x1” square inserts, I had 1.75” diameter (diagonal length of a
1.25" square) aluminum discs made in their place. Besides, it was easier to cut a round hole in the firewall (using a hole
saw) for a nice clean fit.
You're
probably wondering what in the world are those round inserts – instead of the
1” square inserts per plan. Based on the Wayne Hicks’ and others web site, it was
suggested that a larger insert (~1.25" sides square) might be worthwhile. Therefore, instead of the
1”x1” square inserts, I had 1.75” diameter (diagonal length of a
1.25" square) aluminum discs made in their place. Besides, it was easier to cut a round hole in the firewall (using a hole
saw) for a nice clean fit.