Procedure to Slide Steel Rod to Attach
Elevator
I removed the canard elevators several for fill and prime
in Chapter 25. Its time to put it back - well not so quick. There are three
simple tricks that can help to slide the steel rods back a bit easier...
1) Use a sliver of masking tape and attach to the edge of
the washer. This way, you can hold the washer in place while sliding the steel
rod through. Refer to the trick Fitting a small washer in
Tight Space.
2) Once you inserted the steel rods through the outboard
holes, it starts to droop down (inside the elevators). Now, you'll have a hard
time getting it through the second and the third holes. I removed the elevators
and re-insert the steel rods (without the elevators) to confirm which direction
the rods are drooping. It becomes obvious once you get a chance to see it.
Here's the trick - once you got the steel rod in the first
hole, turn the canard right side up. The steel rod will find it's way to the
middle and third hole - pure magic!
3) Grab the end of the steel rod with a vice grip (or hand
drill) and turn the steel rod slowly while feeding it in. Life is good again!
 I
trimmed the inboard ends of the elevators till I got 1/8" clearance when
the elevators are in the full trailing down position. Since the gap is tight
against the fuselage, I have to move the canard off and on the fuselage between
sanding - total about 10 times and it is getting heavier every time.
I
trimmed the inboard ends of the elevators till I got 1/8" clearance when
the elevators are in the full trailing down position. Since the gap is tight
against the fuselage, I have to move the canard off and on the fuselage between
sanding - total about 10 times and it is getting heavier every time.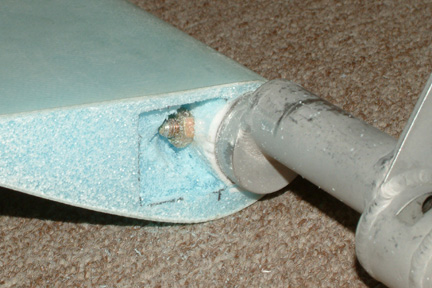 It
has been reported that the offset control arm nut tends to get loose occasionally.
This is especially inconvenient after the inboard ends of the elevator are
sealed off. In addition, there are times this nut needs to be removed for fine
adjustment later on. Besides, I need to plug up the access hole before glassing
the inboard end of the elevators. Note the bolt and regular nut.
It
has been reported that the offset control arm nut tends to get loose occasionally.
This is especially inconvenient after the inboard ends of the elevator are
sealed off. In addition, there are times this nut needs to be removed for fine
adjustment later on. Besides, I need to plug up the access hole before glassing
the inboard end of the elevators. Note the bolt and regular nut.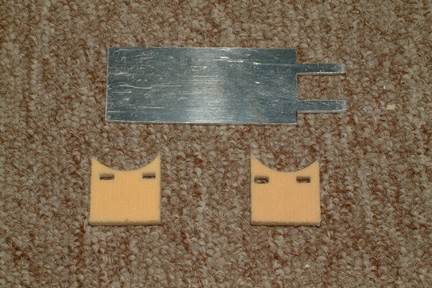 To
seal off the access hole, I shaped a small cover with Clark foam. However, I
need access to the nut behind the cover later. So I made a crude wrench out of
1/16" aluminum and drilled out a couple small slots on the foam cover.
To
seal off the access hole, I shaped a small cover with Clark foam. However, I
need access to the nut behind the cover later. So I made a crude wrench out of
1/16" aluminum and drilled out a couple small slots on the foam cover.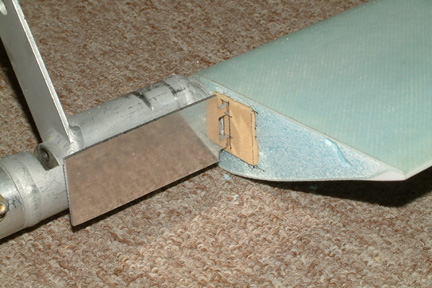 I
figure, if I need to get to the nut after the inboard of the elevator is glassed in, all I need
to do is to drill out those two little slots, stick the wrench in, tighten the
bolt, then seal those little holes back with just about anything (like 5-min
epoxy, hot glue etc.) and nobody can see... so far so good.
I
figure, if I need to get to the nut after the inboard of the elevator is glassed in, all I need
to do is to drill out those two little slots, stick the wrench in, tighten the
bolt, then seal those little holes back with just about anything (like 5-min
epoxy, hot glue etc.) and nobody can see... so far so good.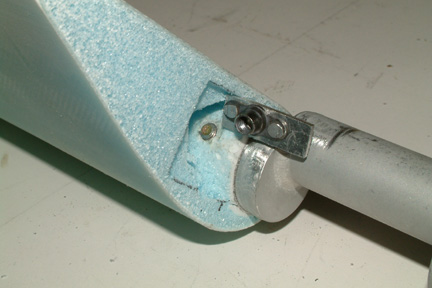 I
posted the question to Wayne Hicks and he suggested a nut plate. Ahhh... that
made sense, but how do I rivet the nut plate onto the tube at this point?
I
posted the question to Wayne Hicks and he suggested a nut plate. Ahhh... that
made sense, but how do I rivet the nut plate onto the tube at this point? 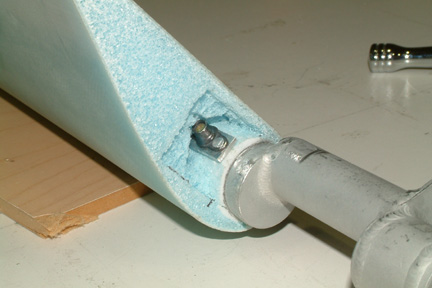 Once
I tightened the bolt to the new nut plate, I floxed the aluminum tab in place
(inside the access hole).
Once
I tightened the bolt to the new nut plate, I floxed the aluminum tab in place
(inside the access hole). 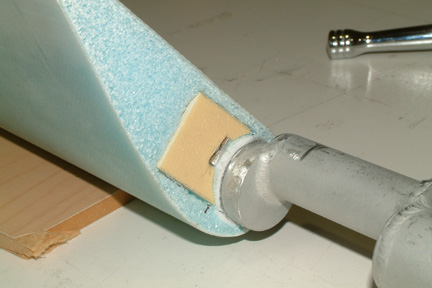 I fitted the foam cover in place and added more flox
to the tab ends (of the foam) and around the foam cover. Then I glassed the
whole inboard end of the elevator.
I fitted the foam cover in place and added more flox
to the tab ends (of the foam) and around the foam cover. Then I glassed the
whole inboard end of the elevator.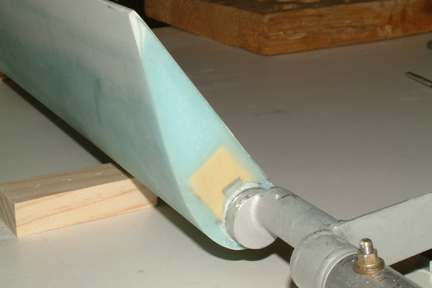
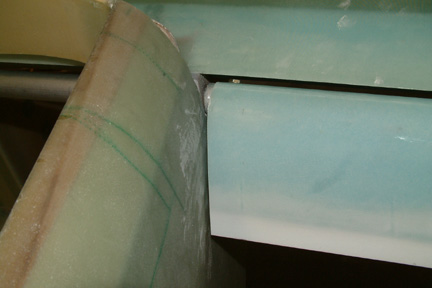
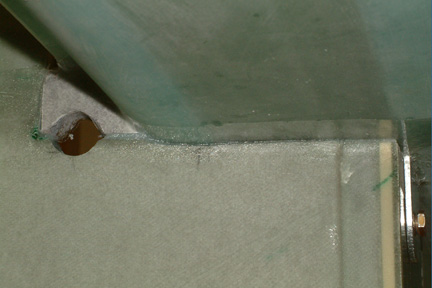 After
all the alignment on the canard was completed, I have a very small gap between
the fuselage edges and the bottom of the canard. I can probably slide 2 maybe 3
sheets of paper between them. In addition, the gap is not uniform throughout. So if
I follow the plan and install 1 ply of glass, I may still end up with a gap
somewhere. I decided to use flox as a filler. It worked out nicely - no gap and no
seam. Don't
forget to lay down packing tape onto the bottom of the canard or it will give
you a really, really bad day when you have to remove the canard!
After
all the alignment on the canard was completed, I have a very small gap between
the fuselage edges and the bottom of the canard. I can probably slide 2 maybe 3
sheets of paper between them. In addition, the gap is not uniform throughout. So if
I follow the plan and install 1 ply of glass, I may still end up with a gap
somewhere. I decided to use flox as a filler. It worked out nicely - no gap and no
seam. Don't
forget to lay down packing tape onto the bottom of the canard or it will give
you a really, really bad day when you have to remove the canard!