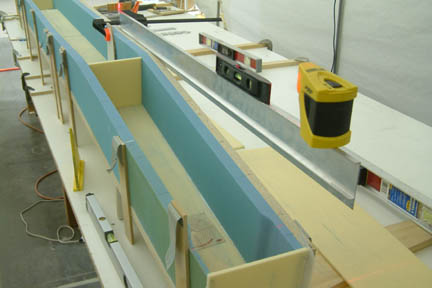
 It
is important to note that the location of the LWA's are based on butt line (e.g.
BL33) and not along the slope of the fixture - though the difference may be
small. Here's how I established the LWA positions. I clamped a straight edge
along the top edge of the fixture, then I placed a laser cross hair at the
designated distance from center (i.e. BL0). The laser drops a horizontal line
straight down onto CS1. I marked the positions with a pen for future reference.
Just to make sure my laser is leveled, I placed a small bubble level for
verification.
Recognizing
the following step is time consuming, Susann offered to give me a hand -
twisting my arm here  ...
While
Susann finished microing the interior surfaces of the spar foam with micro
slurry,
I formed all the fillets with drier micro. Since there were 2 of us, we decided
to do the entire lay-up in one session per plan (that was our first mistake). I pre-wet all four 36"x18" BID strips and sandwiched them in
4 mil plastic (that was the second mistake). After removing the 4 mil plastic
from one side of the BID strip and lowered it onto aft face (CS1) of the spar,
the fillets start putting up a fight. We were having a tough time smoothing out
the BID at the bottom surface, shaping the BID to the corners AND at the same
time, keeping the vertical sides of BID making contact with CS2 & 3. Once
the BID made contact with the sides, we were not able to 'pull' the BID down to
hug the fillets. We removed the remaining 4 mil plastic and tried to smooth it
out with a brush and epoxy with no success. We peeled the BID back away from the
sides, as expected, the micro came along for the ride and the BID stretched out
of shape - what a mess! To make a long story short, we eventually had to pull
the BID out and discard the 36"x18" strip.
Since
we microed the entire inner surface of the spar, we needed to move on before
the micro cured. We repeated the above process and ended up tossing out our
second 36"x18" strip - evidently we didn't learn the lesson the first
time. Since we were at it for 8 hours already, we knew the battle was lost. I
decided to repair the micro on CS2 & 3 surfaces before they completely
cured. We ended up tossing the remaining 36"x18" strips as well. We have to do Lay Up 2 the next
day  .
.
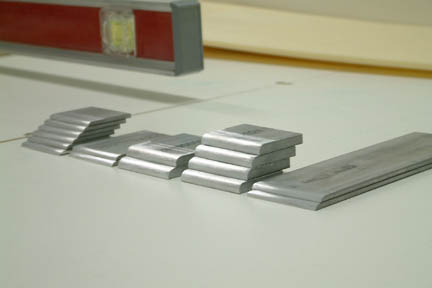 I
cut up all the required LWA aluminum pieces per Page 14-7 with my band saw. Then
I rounded off the edges with my bench belt sander. Since I was not able to cut the
thicker aluminum pieces with high precision (with my band saw), I cut them to
within .05" (a bit jagged), then took them down to exact dimension (along a
straight line) with my bench belt
sander. I then dulled the surfaces with 220 grit sand
paper and wiped off the surfaces with acetone.
I
cut up all the required LWA aluminum pieces per Page 14-7 with my band saw. Then
I rounded off the edges with my bench belt sander. Since I was not able to cut the
thicker aluminum pieces with high precision (with my band saw), I cut them to
within .05" (a bit jagged), then took them down to exact dimension (along a
straight line) with my bench belt
sander. I then dulled the surfaces with 220 grit sand
paper and wiped off the surfaces with acetone. It
is important to note that the location of the LWA's are based on butt line (e.g.
BL33) and not along the slope of the fixture - though the difference may be
small. Here's how I established the LWA positions. I clamped a straight edge
along the top edge of the fixture, then I placed a laser cross hair at the
designated distance from center (i.e. BL0). The laser drops a horizontal line
straight down onto CS1. I marked the positions with a pen for future reference.
Just to make sure my laser is leveled, I placed a small bubble level for
verification.
 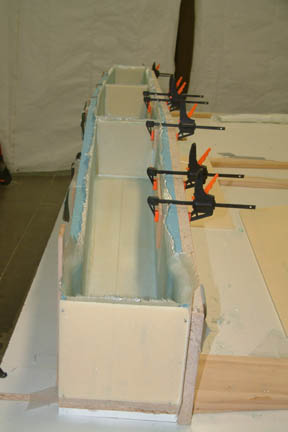 We
also changed the lay up sequence a bit... Starting from one end, we first painted a very slight layer of
epoxy on the bottom side of the spar (CS1), then I removed the 4 mil plastic
(leaving the Saran Wrap layer with the BID) from one of the end BIDs. Then we lowered the center of our
BID onto CS1 surface. Since the sides of the spar (i.e. CS2 & 3) were dry,
the BID would not 'adhere' to the sides, making it much easier to pull and
tug as necessary. We also used thumb tacks to
hold the BID sides up (loosely) against CS2 & 3 foam to keep them out of the
way. Then we smoothed out the bottom (CS1) all the way up the fillet -
stretching the glass and the widened ends as necessary. Then we removed the
thumb tacks on one side, painted a thin layer of epoxy onto the side wall (i.e.
CS2) and then smoothed out the BID against that side. We repeated the same on CS3
side. This time we worked half of the spar, then we took a lunch break.
 After
lunch, we repeated the layups on the remaining spar. The entire spar took us about 9 hours,
but we completed the whole task in one day. I used a few clamps, small flat
boards and plastic sheets to keep the foam against part D during cure. Here's a
picture of one of the in-board LWAs after assembly. As always, I used the flox
smoothing method and it turned out well. I picked up this technique from someone's web
site a couple years back and I have also discussed it in my Methods page.
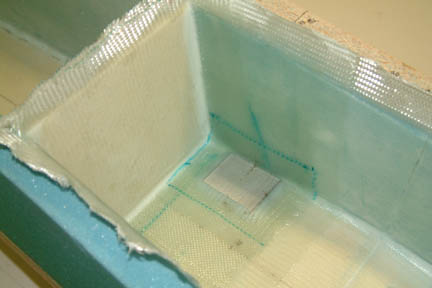
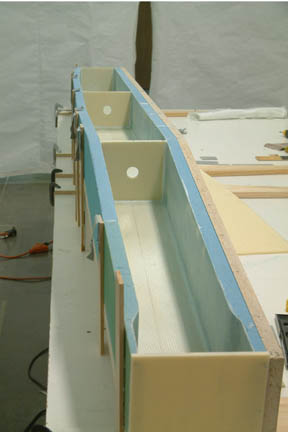 Here's
a picture of the the completed layup for the inside - after the glass was
trimmed and center holes drilled. Though it is not in the plans, it was
suggested in Marc Zietlin's (FAQ) and Rick Maddy's site, that a hole can be drilled to
accommodate future wirings etc. Therefore, I drilled a center hole (1"
diameter) through the 3 inside bulkheads.