Chapter
18 - Section 19
Installing
Canopy Latches
There
are plenty of horror stories and discussions on the Cozy forum that relate to
the design and safety factors on our canopy latch - certainly enough to bring my
attention up front and center. That's one of the many reasons why I appreciate
the members of this forum. Their dedication to safety is
unprecedented!
Before
I get to the lock design, I need to get some latches made first. The only hardware I
was able to buy from Aircraft Spruce on this section were the C2-L and the C4A. I
decided to use 2 C4As (one on each end) such that I do not have to make a C3. I
first made the C8 brackets because they were very similar to the ones we made
for our seat belts.
|
 Per
plan, I installed the three AN3-13A pivot bolts along the longeron for the C2-L.
Instead of the C1-L (the long handle), I replaced it with the third C2-L
instead. The reason for the change is because I have seen some much better
not-to-plan locking mechanisms (by other Cozy builders) and I decided to
follow... more on that later. To make sure all the hooks are synchronized, I used
a dial level, placed it against the edge of the hooks, while I adjusted the length of
C5 and C6. The only problem I encountered was that the C6A was rubbing against the seat
back. Most builders bend the tubing a bit to prevent it from rubbing. I will
probably do the same, but for now, I left it alone. The little friction seems to
keep the locks in place. Per
plan, I installed the three AN3-13A pivot bolts along the longeron for the C2-L.
Instead of the C1-L (the long handle), I replaced it with the third C2-L
instead. The reason for the change is because I have seen some much better
not-to-plan locking mechanisms (by other Cozy builders) and I decided to
follow... more on that later. To make sure all the hooks are synchronized, I used
a dial level, placed it against the edge of the hooks, while I adjusted the length of
C5 and C6. The only problem I encountered was that the C6A was rubbing against the seat
back. Most builders bend the tubing a bit to prevent it from rubbing. I will
probably do the same, but for now, I left it alone. The little friction seems to
keep the locks in place.
|
Canopy
Latch Mechanism
Wayne
Hicks had a nice write-up on his canopy latch design and I decided to follow his
scheme. However, the Hendericks lock he recommended has now come up in price to
a whopping $285 - a good incentive for improvisation...but first, I need
to make the inside latching mechanism work before anything else.
|
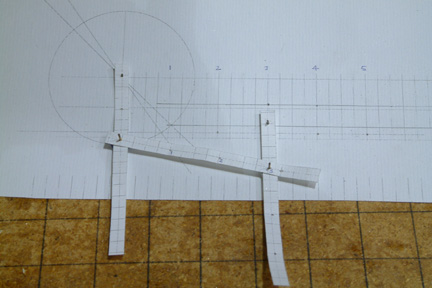
I
took precise dimensions of the latch mechanism and transferred them to a drawing
(using my Corel graphics software). I printed them out on thick report cover
paper and cut them out for paper simulation. Once I got it working correctly on
paper, I took down the final dimensions and made them out of thin aluminum.
|
|
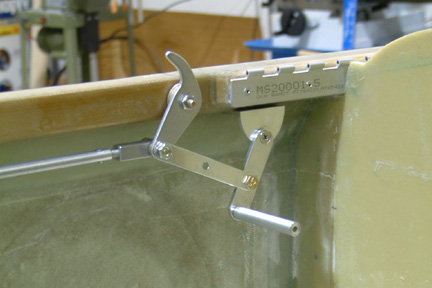
Here's
a picture of my trial latch mechanism - I have yet to beef it up. I just
wanted to see its functionality at this time... The handle will be sitting right
in front of the control stick, providing some warning in the 'unlock' status.
|
|
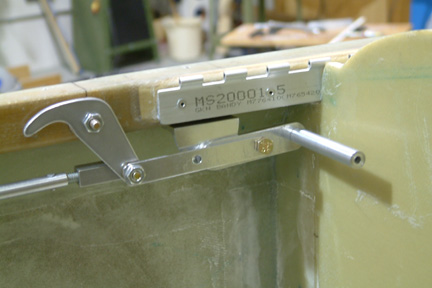
Here's
a picture showing its 'lock' position. My initial thought was to make the handle
a folding arm with a safety pin at the handle tip. Once I fold the handle in, the pin will go
through both latch arms, thus locking them in place. There is no way the latch
will open without intentionally un-folding the handle back out and disengaging
the locking pin in the process. Note the foremost latch that is a C2-L instead
of the long handle C1-L.
|
|
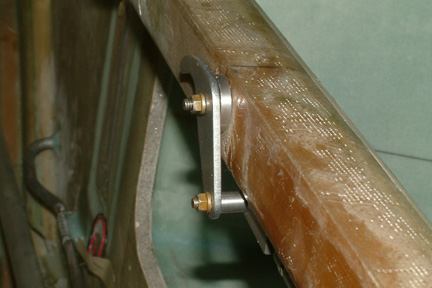 Once
I trial fit the latch mechanism, I replaced all washers with spacers. My
small table top lathe comes in handy for these types of turned parts. Once
I trial fit the latch mechanism, I replaced all washers with spacers. My
small table top lathe comes in handy for these types of turned parts.
|
Installing
the C8 Mounting Brackets
I
mounted the C8 latch brackets per plan. I left the IP cover off while bondoing
these brackets inside the canopy - the bondo fumes can do a number on you - I
was jolly the rest of the evening ,
just kidding... I did
not have any problems in mounting the front and middle brackets. I had to file
down the third bracket a bit to make it fit - not a big issue though. I did not
have to re-adjust the length of the connecting rods.
,
just kidding... I did
not have any problems in mounting the front and middle brackets. I had to file
down the third bracket a bit to make it fit - not a big issue though. I did not
have to re-adjust the length of the connecting rods.