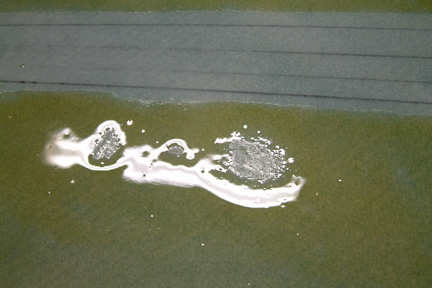
 I
experienced an unexpected result with this 3 layer E-Z Poxy. Craters and pin holes
started forming on the surface even with thick layers of the epoxy. Here's a
closer look at the pin holes / craters formed. They were random and were
difficult to predict. I posted this unusual phenomenon on the Cozy site and
received many responses. I was, in a way, relieved to learn that many builders
before me had similar experiences. (You can probably find many of these
correspondence in the Cozy forum archives).
I
experienced an unexpected result with this 3 layer E-Z Poxy. Craters and pin holes
started forming on the surface even with thick layers of the epoxy. Here's a
closer look at the pin holes / craters formed. They were random and were
difficult to predict. I posted this unusual phenomenon on the Cozy site and
received many responses. I was, in a way, relieved to learn that many builders
before me had similar experiences. (You can probably find many of these
correspondence in the Cozy forum archives).
From
all the responses, I concluded that this may be a surface tension issue though
it looks like surface contamination to me. I decided to change my procedure a
bit and re-do the surface. Here's what I did:
-
I lay down a piece of plastic on the bottom surface of the top skin;
-
Traced and cut out the plastic to the exact size and shape to the area of
intended coverage (i.e. avoid the t-hat area);
-
Sanded the previously coated E-Z Poxy off the surface;
-
Vacuumed the surface completely and carefully;
-
Warmed up the resin and hardener to about 100 degrees F;
-
Spread a thick layer of E-Z Poxy onto the surface with a brush;
-
Laid down the plastic over each area;
-
Squeegeed out all air bubbles and smoothed out the epoxy under the plastic;
-
Wiped off the excess epoxy that spilled out to the plastic edges;
-
Let cure;
-
Once cured, I removed the plastic and re-prep the surface one more time;
-
Then I brushed on 2 more layers of E-Z Poxy and let cure.
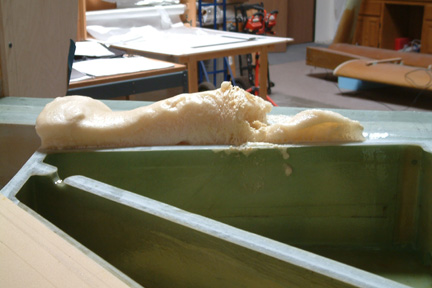 The
area between baffle TTE and the center section spar must be filled with pour foam.
Since the pour foam mixture ratio is 1:1, Susann poured out a 3 oz cup of each
part and then poured them into a 12 oz cup. I stirred the mixture like cream in
coffee. Once it started to expand, I poured the entire cup of pour foam into the
cavity. Meanwhile, Susann readied the next cup for me to mix. The cavity got filled
quickly, I only needed 1/2 of the second batch. Here's how the pour foam grows out
of control...
The
area between baffle TTE and the center section spar must be filled with pour foam.
Since the pour foam mixture ratio is 1:1, Susann poured out a 3 oz cup of each
part and then poured them into a 12 oz cup. I stirred the mixture like cream in
coffee. Once it started to expand, I poured the entire cup of pour foam into the
cavity. Meanwhile, Susann readied the next cup for me to mix. The cavity got filled
quickly, I only needed 1/2 of the second batch. Here's how the pour foam grows out
of control...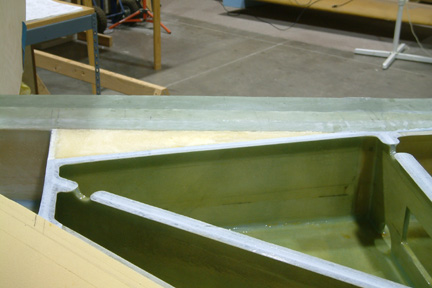 I
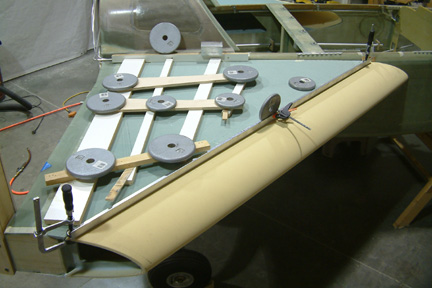
allowed the foam to settle down for ~45 minutes before I started cutting it
down and sanding it flush to the ribs and center section spar. I have a few
small gaps and voids but decided not to add any more of this crazy foam in
them.
I
allowed the foam to settle down for ~45 minutes before I started cutting it
down and sanding it flush to the ribs and center section spar. I have a few
small gaps and voids but decided not to add any more of this crazy foam in
them. Note
the smooth and shinny surface without craters and pin holes
Note
the smooth and shinny surface without craters and pin holes When
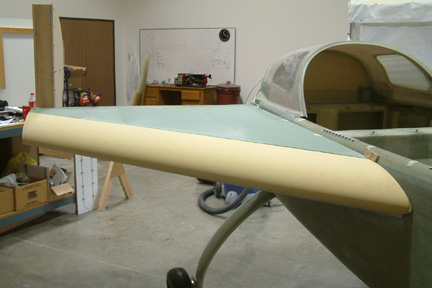
I installed the Feather Lite leading edge in the earlier section, I already started
the forward access hole. I decided to deviate from the plans a bit and changed the
shape of the access holes to give them a better flow. Following the shape of the
leading edge (at the front) gives a bit more elbow room, though not as much as the
'extended strake'.
When
I installed the Feather Lite leading edge in the earlier section, I already started
the forward access hole. I decided to deviate from the plans a bit and changed the
shape of the access holes to give them a better flow. Following the shape of the
leading edge (at the front) gives a bit more elbow room, though not as much as the
'extended strake'.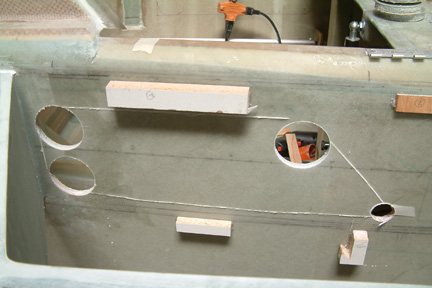 Then
I cut the rear access hole to follow the seat line. It always gives me a bit of
uneasiness when taking a large hole drill to any part of the airplane
Then
I cut the rear access hole to follow the seat line. It always gives me a bit of
uneasiness when taking a large hole drill to any part of the airplane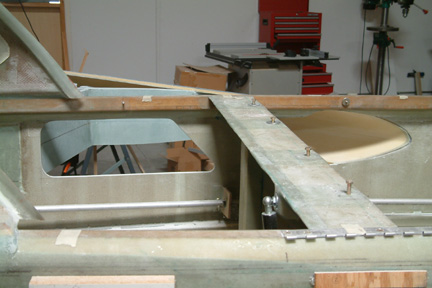 Eventually,
it turned out reasonably well...
Eventually,
it turned out reasonably well... 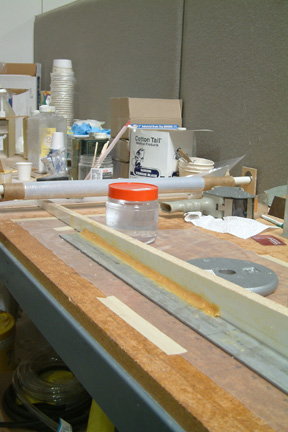 I
wrapped two straight edge strips with packing tape. In my case, I have a metal strip
and a wood strip. Susann helped me to draw a 1/2" straight line on the wood
strip - that's a guide for the thickness of the flox per plan. I sat the 2 strips
perpendicular to each other - with a sheet of plastic underneath them (to keep
the flox from getting all over the place).
I
wrapped two straight edge strips with packing tape. In my case, I have a metal strip
and a wood strip. Susann helped me to draw a 1/2" straight line on the wood
strip - that's a guide for the thickness of the flox per plan. I sat the 2 strips
perpendicular to each other - with a sheet of plastic underneath them (to keep
the flox from getting all over the place).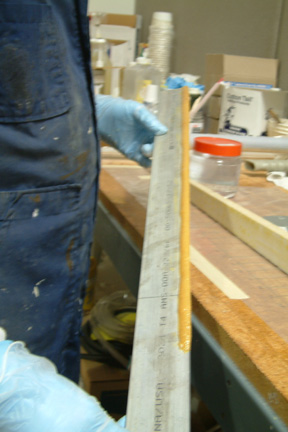 While
I was preparing the flox bead, Susann painted a layer of pure epoxy onto the top
of the T-hat. Once the flox bead is ready, I picked up the metal strip while
scraping up all the flox along the back vertical face (picture left).
While
I was preparing the flox bead, Susann painted a layer of pure epoxy onto the top
of the T-hat. Once the flox bead is ready, I picked up the metal strip while
scraping up all the flox along the back vertical face (picture left).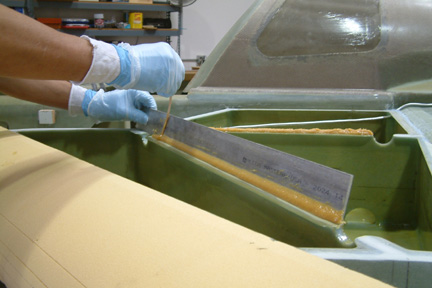 I
transferred the wet flox bead to the T-hat location. With a narrow stir stick
(thank you, Starbucks!) and using a quick 'jig-saw' motion, I dropped the flox
bead onto the desired location.
I
transferred the wet flox bead to the T-hat location. With a narrow stir stick
(thank you, Starbucks!) and using a quick 'jig-saw' motion, I dropped the flox
bead onto the desired location. 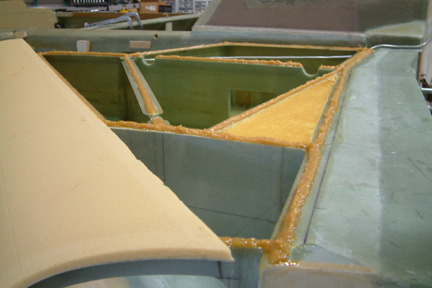
 Here's
a picture of the top skin after the flox cured.
Here's
a picture of the top skin after the flox cured.