 It
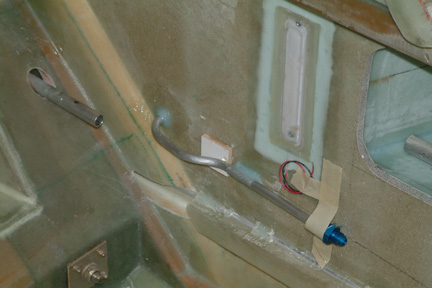
was a bit challenging to determine the exact fuel line outlet piping location
because the plan did not show the extra 2" thick foam along side the forward
landing gear bulkhead (note the yellow foam aft the fuel line?). By the time the piping protruded out of the foam and make
the 135 degree bend, the piping bend elbow will be way out into the fuselage
(passenger sitting area). To avoid that, I moved the outlet piping about 2"
forward per plan (7.5" aft of the fuel gauge edge). I also made the bend a
bit different such that the fuel line will be closer to the fuselage sides and
away from the control rods. I went 90o then 45o as shown.
I also projected a straight line (note the line at the tip of the fuel line)
from the fuel line exit point sloping down to the seat back and above the wire
conduit.
It
was a bit challenging to determine the exact fuel line outlet piping location
because the plan did not show the extra 2" thick foam along side the forward
landing gear bulkhead (note the yellow foam aft the fuel line?). By the time the piping protruded out of the foam and make
the 135 degree bend, the piping bend elbow will be way out into the fuselage
(passenger sitting area). To avoid that, I moved the outlet piping about 2"
forward per plan (7.5" aft of the fuel gauge edge). I also made the bend a
bit different such that the fuel line will be closer to the fuselage sides and
away from the control rods. I went 90o then 45o as shown.
I also projected a straight line (note the line at the tip of the fuel line)
from the fuel line exit point sloping down to the seat back and above the wire
conduit.
Once
set, I floxed in the fuel line and held it in place with an additional glass
strip. I prepared a small layer of BID (with a hole cut out in the middle) and
slipped it through the fuel line such that I can cover up the flox afterwards. The
small wood block and masking tape were there to hold the pipe in place
during cure. Note the fuel sight gauge has been microed and glassed in place as well.
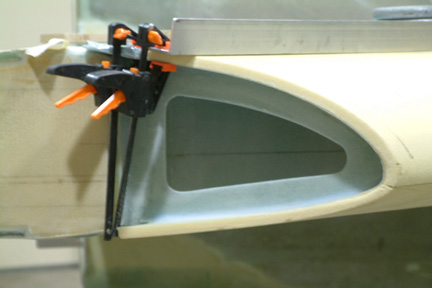 Since
I am using the Feather Lite leading edge, the OD part does not fit well..
Instead, I build a new end rib (more like the R57 and R33) as the end rib. I
opened a large hole in the middle such that I can reach through to R57, in case I
experience a leak down the road.
Since
I am using the Feather Lite leading edge, the OD part does not fit well..
Instead, I build a new end rib (more like the R57 and R33) as the end rib. I
opened a large hole in the middle such that I can reach through to R57, in case I
experience a leak down the road.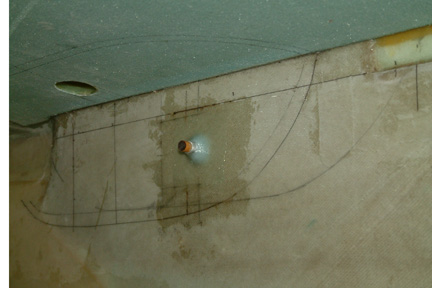 I
followed the Plan's approach in installing the fuel line through the fuselage
(as shown).
I
followed the Plan's approach in installing the fuel line through the fuselage
(as shown).