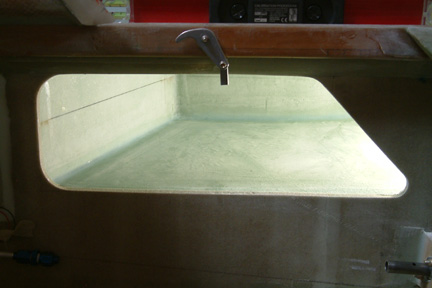
 Here
a picture of my cutout and the lip...
Here
a picture of my cutout and the lip...
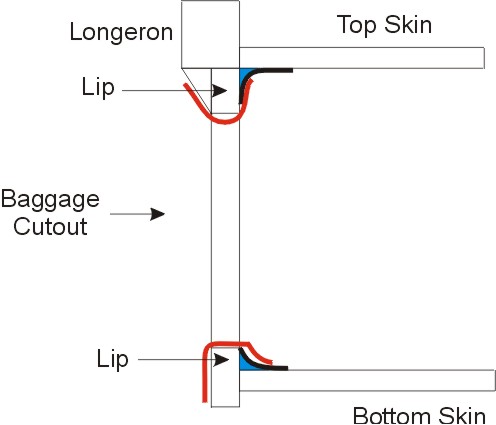
Recognizing the deviation from plan
and that it may be structural, I think I should make the necessary correction
with the 2 options below:
Option1: (per Plan)
Trim the lip off (together with the
flox corner, ouch!) such that the baggage cutout is flush with the bottom skin. Then
re-glass the bottom skin with 2 ply BID strip. Starting from 1" into the
bottom skin, wrap over the cutout edges and 1" down the inside of the
fuselage.
Option 2:
Leave the existing flox corners and 2
plies BID as is, but add an additional 2 Plies BID layer over the the existing
plies and wrap over the lip, then down the side of the fuselage. (as shown by
the red lines). I do not know if Option 2 actually add more strength to the
joint or weaker than the Plans version. I certainly wanted to stay with the
stronger version.
I got a
confirmation from Marc Zietlin that - structurally, I am fine the way it is and
that I can leave it alone if I want. What a relief .
Now I can move forward and complete all the seams...
.
Now I can move forward and complete all the seams...
 I did not pay
close enough attention to the Plans and made a flox corner and glassed the bottom skin to the side of
fuselage with 2 layers of BID (as shown in picture in blue). I have not glass in
the top skin lip yet but I drawn it for illustration purposes only.
I did not pay
close enough attention to the Plans and made a flox corner and glassed the bottom skin to the side of
fuselage with 2 layers of BID (as shown in picture in blue). I have not glass in
the top skin lip yet but I drawn it for illustration purposes only.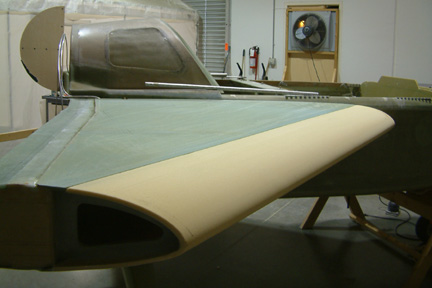 I
prep-sand the top skin foam using a straight edge and 36" sanding board. I
recalled a comment that 'its easier to sand foam now than micro later'. Here's a
picture of my top skin after I smoothed out the top skin.
I
prep-sand the top skin foam using a straight edge and 36" sanding board. I
recalled a comment that 'its easier to sand foam now than micro later'. Here's a
picture of my top skin after I smoothed out the top skin. 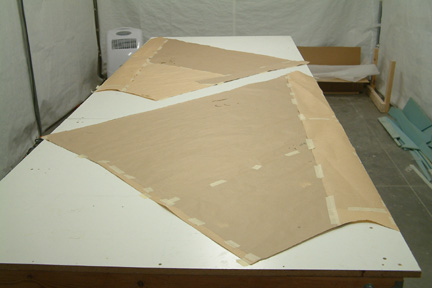 In
order to cut the UNI layers for the top skin, I modified the bottom skin paper
template for the top skin. This time, I marked clearly (on the template) the
orientation of the glass fibers. These paper templates allows me to pre-cut all
the necessary UNI for the top skin AHEAD of time and it made the lay-up effort
much easier. I did not have to struggle (as much) when lining up the glass
layers onto the strakes.
In
order to cut the UNI layers for the top skin, I modified the bottom skin paper
template for the top skin. This time, I marked clearly (on the template) the
orientation of the glass fibers. These paper templates allows me to pre-cut all
the necessary UNI for the top skin AHEAD of time and it made the lay-up effort
much easier. I did not have to struggle (as much) when lining up the glass
layers onto the strakes.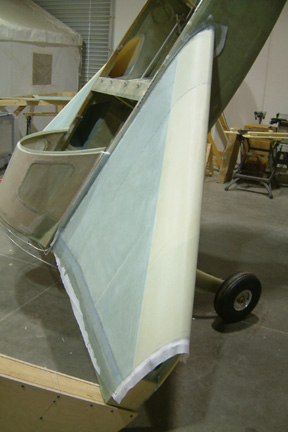 I
applied thick micro in all the seams and gaps on the foam surfaces. Susann and
Cassandra decided to help me with the top skin. We decided to stand the plane up
in its Space Shuttle pose to help with the glassing effort. The most difficult
part was to get the UNI to lay down squarely as Plan. The extra two pairs of
hands sure helps! After the 4 layers of UNI were epoxied in place, we applied a
peel ply and let cure.
I
applied thick micro in all the seams and gaps on the foam surfaces. Susann and
Cassandra decided to help me with the top skin. We decided to stand the plane up
in its Space Shuttle pose to help with the glassing effort. The most difficult
part was to get the UNI to lay down squarely as Plan. The extra two pairs of
hands sure helps! After the 4 layers of UNI were epoxied in place, we applied a
peel ply and let cure.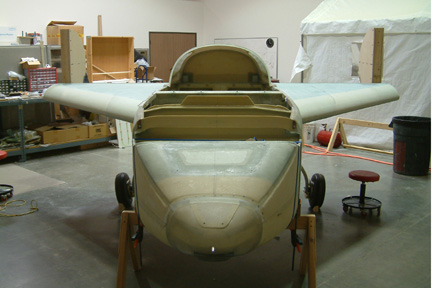 The next day,
Susann and I glassed the top skin to the left. Good results as well.
The next day,
Susann and I glassed the top skin to the left. Good results as well. 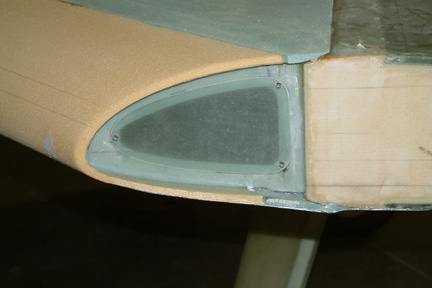 Some
builders mounted their magnetometer in the cavity between R57 and the strake end
ribs, such that they are less affected by electrical interference. Since I am
planning to do the same, this cavity needs to be protected from the elements. I
decided to add a cover (door) to the end of the strakes.
Some
builders mounted their magnetometer in the cavity between R57 and the strake end
ribs, such that they are less affected by electrical interference. Since I am
planning to do the same, this cavity needs to be protected from the elements. I
decided to add a cover (door) to the end of the strakes.