Shaping the Foam
 I
gathered a couple left over 2" foam pieces - enough to make a 10 1/8"
x 12" rectangle. I glued them together with 5 min. epoxy. Then I trimmed it to 10
1/8" x 12" x 2" size. The extra 1/8" was for accommodating
the cut line later on.
I
gathered a couple left over 2" foam pieces - enough to make a 10 1/8"
x 12" rectangle. I glued them together with 5 min. epoxy. Then I trimmed it to 10
1/8" x 12" x 2" size. The extra 1/8" was for accommodating
the cut line later on.
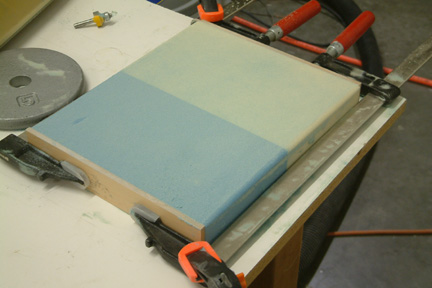
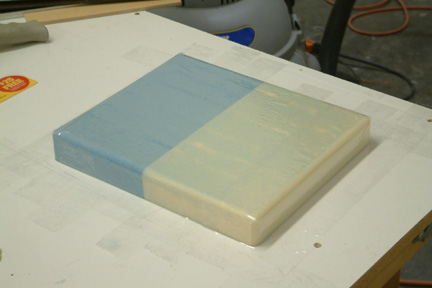
I located a couple wood strips and cut them to 1 1/2" x 10" and 1 5/8" x 10" respectively. Then I clamped the foam between the 2 wood strips. The wood strips were used as a height gauge for shaping the foam. With everything clamped down, I took a long sanding board and sanded down the foam to the Plan's dimensions. I rounded off the edges so that the BID will lay down nicely later on.
 I
then taped
down the foam block with packing tape, including the table top around the block.
I
then taped
down the foam block with packing tape, including the table top around the block.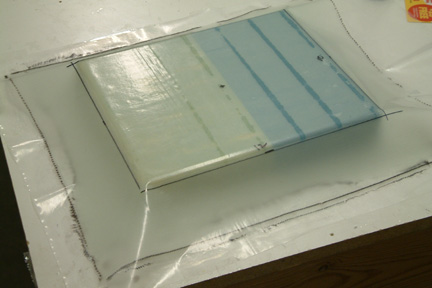 I
wet out 2 BID layers (one at a time) and squeegeed out the excess epoxy between
two sheets of plastic. Then I drew a 12" x 10" rectangle on the
plastic for ease of placement onto the foam.
I
wet out 2 BID layers (one at a time) and squeegeed out the excess epoxy between
two sheets of plastic. Then I drew a 12" x 10" rectangle on the
plastic for ease of placement onto the foam. 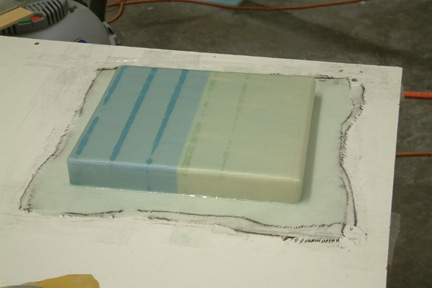 I
removed the plastic and shaped the glass over the foam with a brush.
I
removed the plastic and shaped the glass over the foam with a brush. After
the epoxy cured, I popped the map pocket loose, trimmed the edges
to 1/2" wide and cut it in half. Now I
have both of my map pockets.
After
the epoxy cured, I popped the map pocket loose, trimmed the edges
to 1/2" wide and cut it in half. Now I
have both of my map pockets.