Building
Support Foam for the Canard Over Hang
 Initially,
I dug out the depression at the aft end of the nose cover to accommodate the
nose door per plan (.2" deep depression). Later, I changed my mind from the
plans method and decided the mount the nose door with 4 screws instead of a lip
and 2 screws. The deep depression was not necessary and needs to be filled back up.
I tried several approaches with limited success. Finally I just 5-min. epoxied a
strip of foam onto the depression and sanded it flush with the canard cover.
Initially,
I dug out the depression at the aft end of the nose cover to accommodate the
nose door per plan (.2" deep depression). Later, I changed my mind from the
plans method and decided the mount the nose door with 4 screws instead of a lip
and 2 screws. The deep depression was not necessary and needs to be filled back up.
I tried several approaches with limited success. Finally I just 5-min. epoxied a
strip of foam onto the depression and sanded it flush with the canard cover.
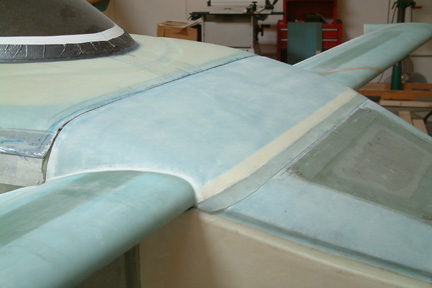
After
micro was applied to the canard cover surface, I pre-wet 2 BID tapes (one at a
time, with plastic wrap on one side) and laid them in place carefully. Then I trimmed the BID to size,
removed the plastic wrap and peel-plied.
 When
it was time to work on the canard cover, I
microed the canard cover foam onto the canard per plan. I first filled all the
voids, cracks, holes and the under side with micro and laid it in place. I have to weigh it down to assure maximum contact. Once cured, I double-checked again to make sure the shape
of the foam is symmetrical.
When
it was time to work on the canard cover, I
microed the canard cover foam onto the canard per plan. I first filled all the
voids, cracks, holes and the under side with micro and laid it in place. I have to weigh it down to assure maximum contact. Once cured, I double-checked again to make sure the shape
of the foam is symmetrical.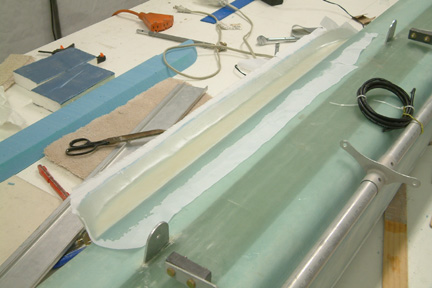 I
glassed both the forward and the aft face foam at the same time because they are
pretty straight forward. First, I turned the canard over to its back. I sanded down
a thin depression over the forward face to accommodate the new 2 plies BID. Then
I smoothed out the rest of the foam surfaces. I filled all holes with dry micro
and then the rest of the foam surfaces with wet micro. I
wet out 2 layers of BID first, then glassed and peel-plied the forward face per Plan.
It was not too difficult, just need to be a bit careful.
I
glassed both the forward and the aft face foam at the same time because they are
pretty straight forward. First, I turned the canard over to its back. I sanded down
a thin depression over the forward face to accommodate the new 2 plies BID. Then
I smoothed out the rest of the foam surfaces. I filled all holes with dry micro
and then the rest of the foam surfaces with wet micro. I
wet out 2 layers of BID first, then glassed and peel-plied the forward face per Plan.
It was not too difficult, just need to be a bit careful. 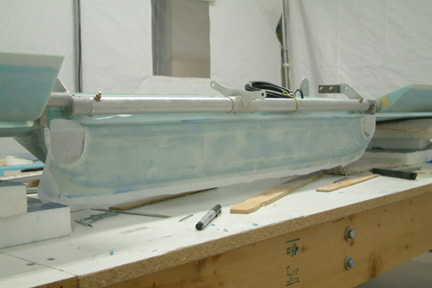 As
for the aft face, I dug a small trench
along the entire edge (top, bottom and around the tabs, in preparation for the
glass-to-glass bond. Then I applied dry flox into the trenches. After I
pre-wet the 2 BID layers, I wet out the dry flox with pure epoxy and repeated
the same glassing process to the aft end.
As
for the aft face, I dug a small trench
along the entire edge (top, bottom and around the tabs, in preparation for the
glass-to-glass bond. Then I applied dry flox into the trenches. After I
pre-wet the 2 BID layers, I wet out the dry flox with pure epoxy and repeated
the same glassing process to the aft end. 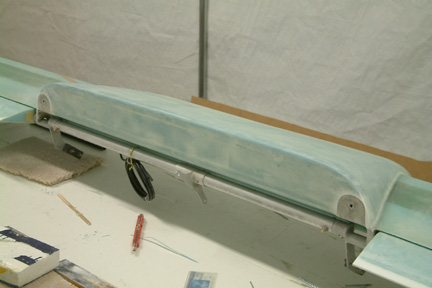 Once
cured, I removed all peel-plies and sanded down the edges smoothly. Here's a picture
of the aft end with glass-to-glass bond along the entire edge - it turned out
nice
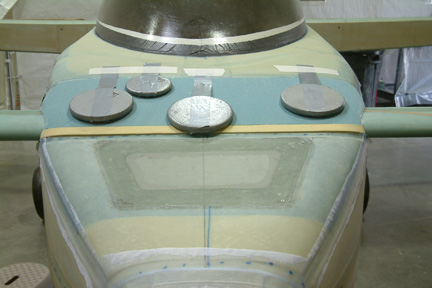
Once
cured, I removed all peel-plies and sanded down the edges smoothly. Here's a picture
of the aft end with glass-to-glass bond along the entire edge - it turned out
nice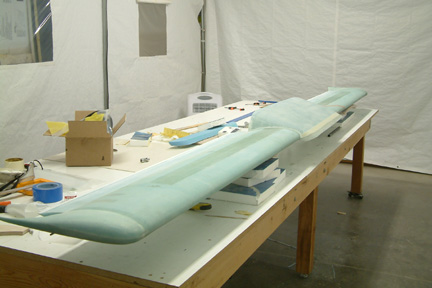 Here
a picture of the completed canard cover... I need to smooth out the cover sides
some more down the road.
Here
a picture of the completed canard cover... I need to smooth out the cover sides
some more down the road.